July 31, 2023
Summary: in this tutorial, you will step by step learn how to install PostgreSQL on your local system.
PostgreSQL was developed for UNIX-like platforms, however, it was designed to be portable. It means that PostgreSQL can also run on other platforms such as macOS, Solaris, and Windows.
Since version 8.0, PostgreSQL offers an installer for Windows systems that makes the installation process easier and faster. For development purposes, we will install PostgreSQL version 12 on Windows 10.
There are three steps to complete the PostgreSQL installation:
- Download PostgreSQL installer for Windows
- Install PostgreSQL
- Verify the installation
1) Download PostgreSQL Installer for Windows
First, you need to go to the download page of PostgreSQL installers on the EnterpriseDB.
Second, click the download link as shown below:
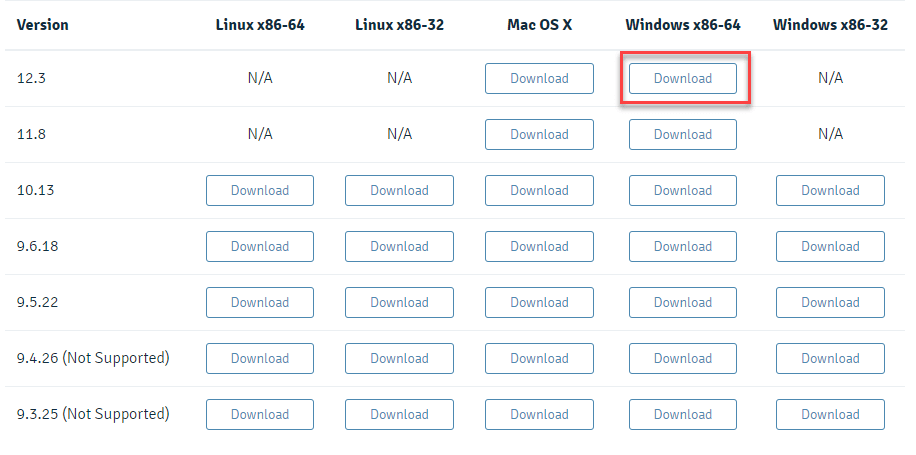
It will take a few minutes to complete the download.
2) Install PostgreSQL on Window step by step
To install PostgreSQL on Windows, you need to have administrator privileges.
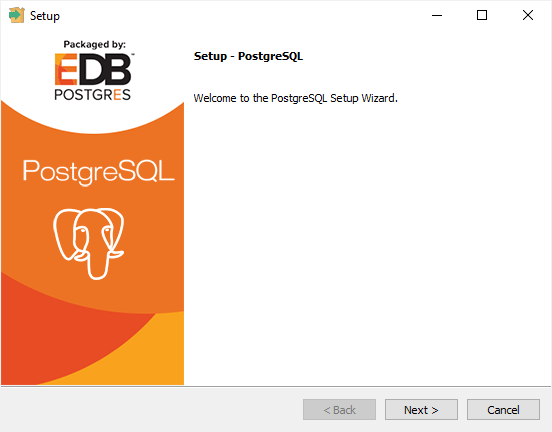
Step 1. Double click on the installer file, an installation wizard will appear and guide you through multiple steps where you can choose different options that you would like to have in PostgreSQL.
Step 2. Click the Next button
Step 3. Specify installation folder, choose your own or keep the default folder suggested by PostgreSQL installer and click the Next button

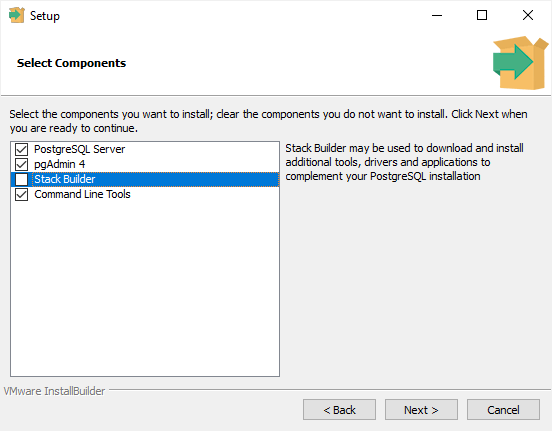
Step 4. Select software components to install:
- The PostgreSQL Server to install the PostgreSQL database server
- pgAdmin 4 to install the PostgreSQL database GUI management tool.
- Command Line Tools to install command-line tools such as psql, pg_restore, etc. These tools allow you to interact with the PostgreSQL database server using the command-line interface.
- Stack Builder provides a GUI that allows you to download and install drivers that work with PostgreSQL.
For the tutorial on this website, you don’t need to install Stack Builder so feel free to uncheck it and click the Next button to select the data directory:
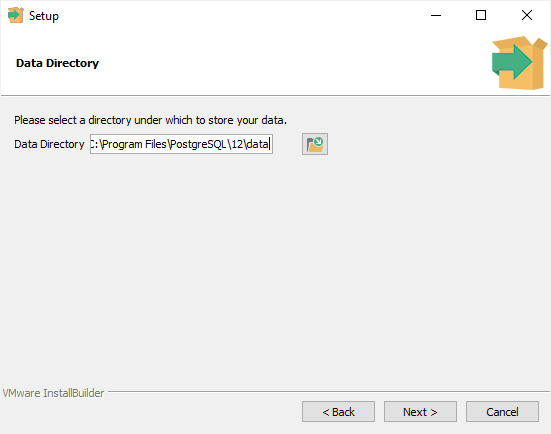
Step 5. Select the database directory to store the data or accept the default folder. And click the Next button to go to the next step:
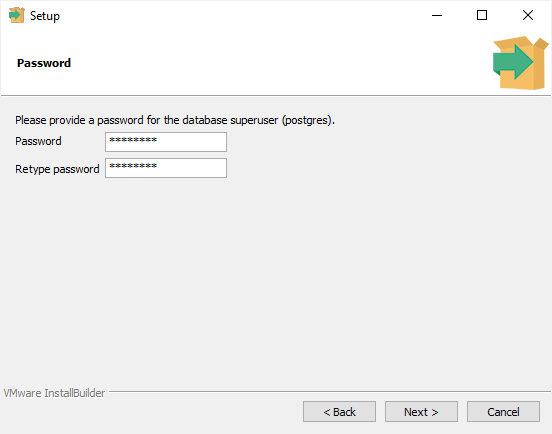
Step 6. Enter the password for the database superuser (postgres)
PostgreSQL runs as a service in the background under a service account named postgres. If you already created a service account with the name postgres, you need to provide the password of that account in the following window.
After entering the password, you need to retype it to confirm and click the Next button:
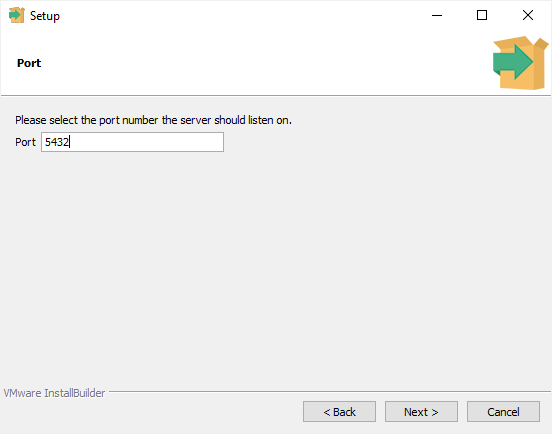
Step 7. Enter a port number on which the PostgreSQL database server will listen. The default port of PostgreSQL is 5432. You need to make sure that no other applications are using this port.
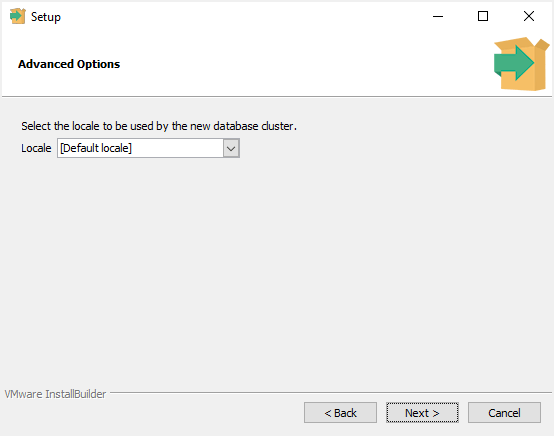
Step 8. Choose the default locale used by the PostgreSQL database. If you leave it as default locale, PostgreSQL will use the operating system locale. After that click the Next button.
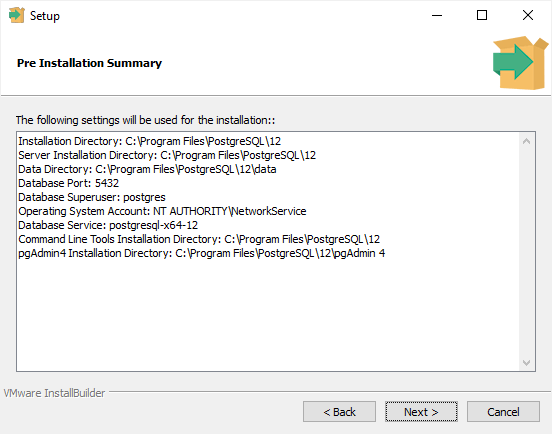
Step 9. The setup wizard will show the summary information of PostgreSQL. You need to review it and click the Next button if everything is correct. Otherwise, you need to click the Back button to change the configuration accordingly.
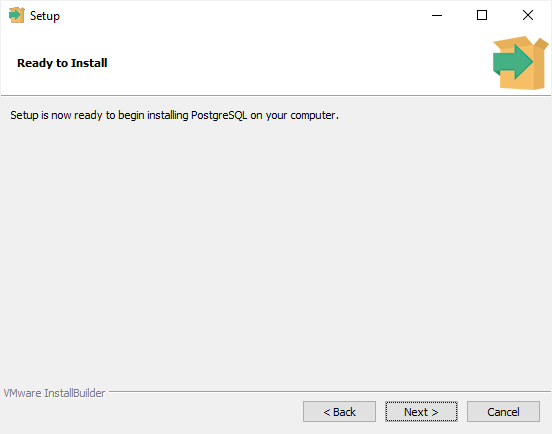
Now, you’re ready to install PostgreSQL on your computer. Click the Next button to begin installing PostgreSQL.
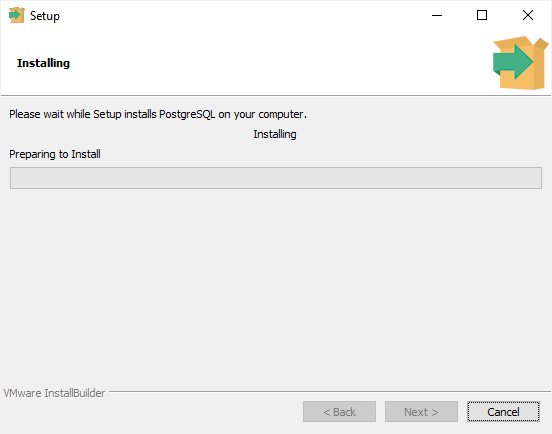
The installation may take a few minutes to complete.
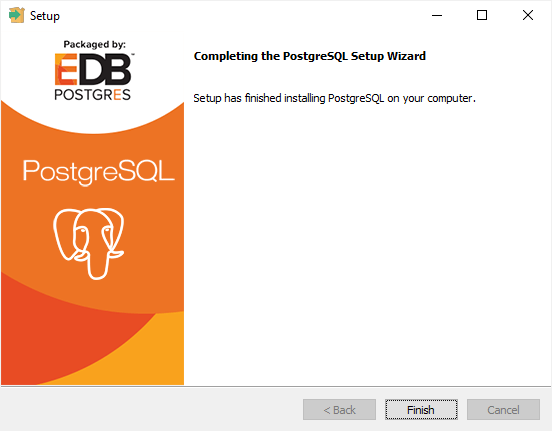
Step 10. Click the Finish button to complete the PostgreSQL installation.
3) Verify the Installation
There are several ways to verify the PostgreSQL installation. You can try to connect to the PostgreSQL database server from any client application e.g., psql and pgAdmin.
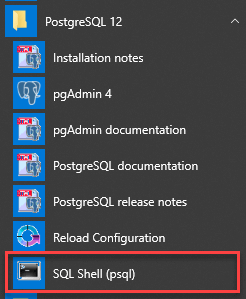
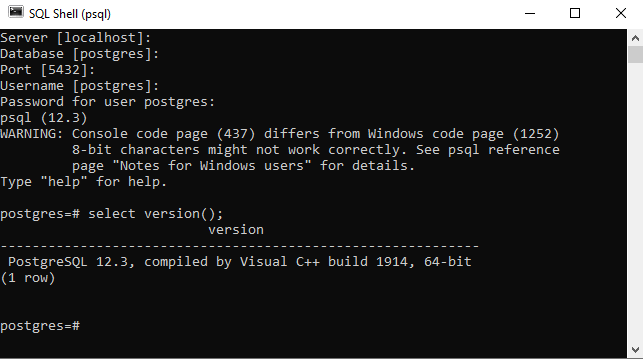
The quick way to verify the installation is through the psql program.
First, click the psql application to launch it. The psql command-line program will display.
Second, enter all the necessary information such as the server, database, port, username, and password. To accept the default, you can press Enter. Note that you should provide the password that you entered during installing the PostgreSQL.
Server [localhost]:
Database [postgres]:
Port [5432]:
Username [postgres]:
Password for user postgres:
psql (12.3)
WARNING: Console code page (437) differs from Windows code page (1252)
         8-bit characters might not work correctly. See psql reference
         page "Notes for Windows users" for details.
Type "help" for help.

postgres=#
Third, issue the command SELECT version(); you will see the following output:
Congratulation! you’ve successfully installed PostgreSQL database server on your local system. Let’s learn various ways to connect to PostgreSQL database server.